Bootstrap Checkbox Position
Overview
From time to time the elementary features might probably become very essential-- most especially the moment you come to need them. As an example precisely how do your website visitors connect with the pages you set up stating a simple Boolean action-- simply just yes or no referring to some of the issues you want to ask, exactly how they do agree to the conditions or line up a few of the attainable options they might have. We often surpass this with no paying enough of an consideration to the component chargeable for these sorts of actions still, the Bootstrap Checkbox Class is actually a really critical component-- one our forms just can't in fact do without.
Inside the latest fourth edition of the Bootstrap platform we are supplied with the .form-check plus .form-check-label classes to present the good old default checkbox feature and if you would want them stacked simply be sure you have wrapped them within an extra <div> with the .form-check class assigned to it. In order your checkboxes to show correctly in Bootstrap 4 you have to in addition appoint the .form-check-label class to the <label> component and the <input> tag itself ought to have the .form-check-input class.
Effective ways to apply the Bootstrap checkbox:
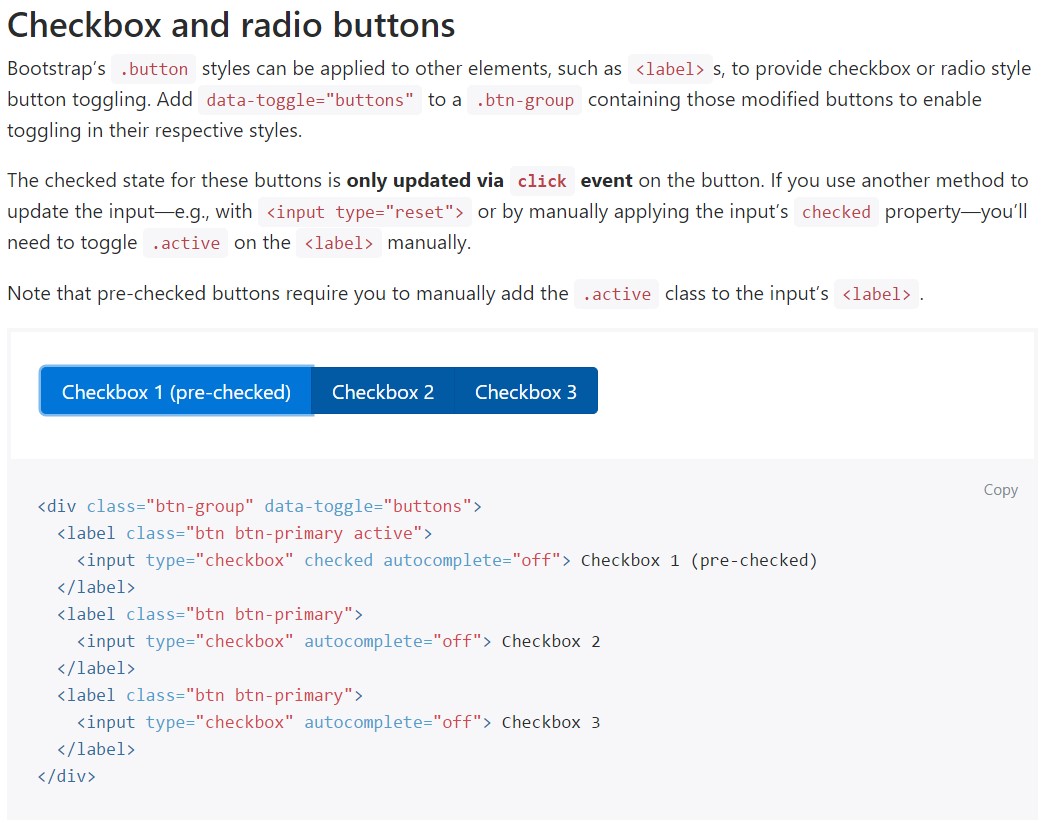
The examined condition for these buttons is only up-dated with click event on the button. If you put to use another approach to update the input-- e.g., with <input type="reset"> or simply by manually applying the input's examined property-- you'll should toggle .active on the <label> by hand.

<div class="btn-group" data-toggle="buttons">
  <label class="btn btn-primary active">
    <input type="checkbox" checked autocomplete="off"> Checkbox 1 (pre-checked)
  </label>
  <label class="btn btn-primary">
    <input type="checkbox" autocomplete="off"> Checkbox 2
  </label>
  <label class="btn btn-primary">
    <input type="checkbox" autocomplete="off"> Checkbox 3
  </label>
</div>
Sometimes we require the checkboxes to come within our forms without the site visitor actually having the capacity to have some practice clicking on them-- that is generally where exactly the disabled option comes in.
In order to disable correctly a checkbox in Bootstrap 4 applying the common HTML attribute disabled attribute along with just incorporating it you could easily as well format the pointer whenever the site visitor hovers over the disabled component making it to a "not allowed " icon having your forms much more simple and natural to use.
In the case that you really like the idea and in fact really want to accomplish this you must specify the .disabled class to the parent .form-check component so as the effect to display best while the entire feature has been actually hovered-- this will make things relatively even more clear
Another scenario
Whenever working with checkboxes, wrap all of them in a <label> element having the Bootstrap 4 .custom-control plus .custom-checkbox classes added.
Utilize .custom-control-input with the concrete <input> element.
Additionally work with two <span> elements: one with the .custom-control-indicator class added, and the other with .custom-control-description ( and also place the actual label inside this element).
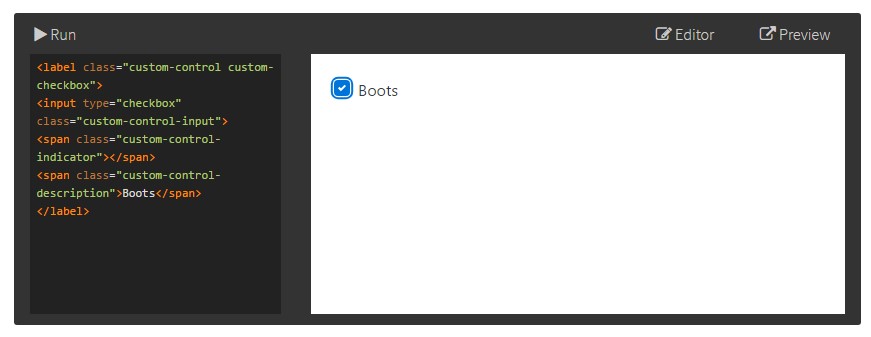
<label class="custom-control custom-checkbox">
<input type="checkbox" class="custom-control-input">
<span class="custom-control-indicator"></span>
<span class="custom-control-description">Boots</span>
</label>
Bootstrap Checkbox Input forms
Default radios and checkboxes are greatly enhanced upon with the support of .form-check, a individual class for each input types that enhances the layout and behavior of their HTML elements. Checkboxes are for picking one or a couple of options in a list, while at the same time radios are for choosing one capability from several.
Disabled checkboxes and radios are maintained, but to supply a not-allowed cursor on hover of the parent <label>, you'll need to add in the .disabled class to the parent .form-check. The disabled class will also light up the text coloration to help signify the input's state.
A fresh feature for the Bootstrap version 4 framework is the introduction of the so called custom form components. These are the very same components we are knowing in usefulness but styled a lot more appealing and also in the Bootstrap approach. Using them you can certainly add certain spice as well as individuality to your content with just appointing a couple of special classes to the controls you involve in your forms.
For you to apply custom checkboxes wrap them in a <label> element specifying to it the .custom-control and .custom-checkbox classes. Whenever creating the <input> element verify you have actually also added the .custom-control-input to it. You need to likewise work with two <span> elements - one having .custom-control-indicator class employed and another carrying the .custom-control-description class along with the actual explanation you would certainly need to have to attach to the label your Bootstrap Checkbox Toggle.
Conclusions
That's pretty much all you ought to produce in order to set a checkbox component for your Bootstrap 4 powered website page and add in certain custom flavor to it including it a stylish looks. Right now all you need to do is repeat the drill till you have actually reviewed all the checkboxes needed are already on the web page.
Examine a few video guide regarding Bootstrap checkbox
Linked topics:
Bootstrap checkbox formal documentation
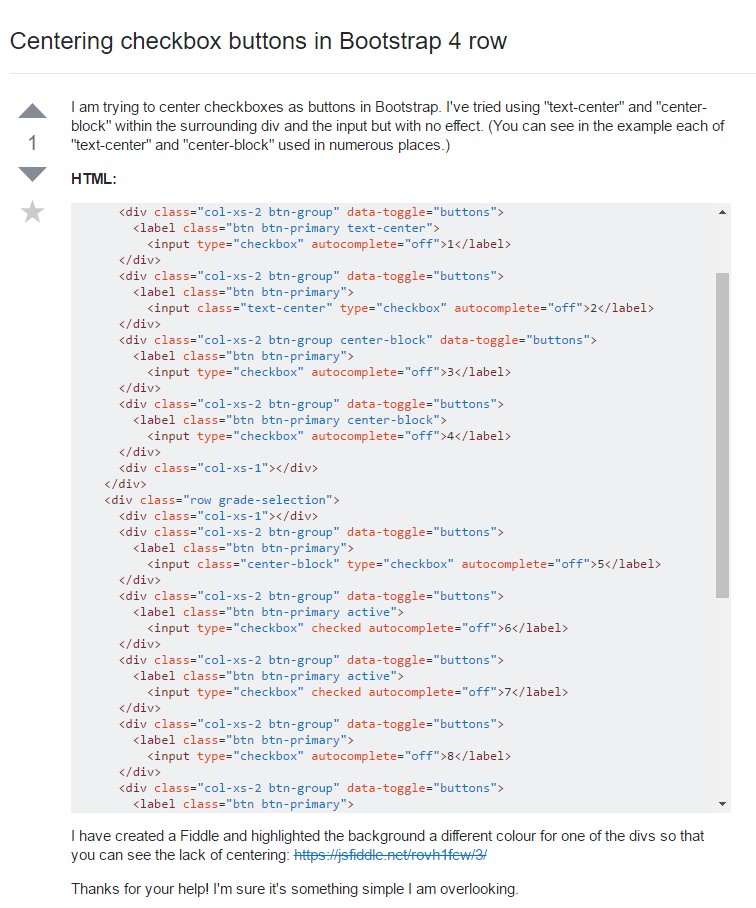
Centering checkbox buttons in Bootstrap 4 row
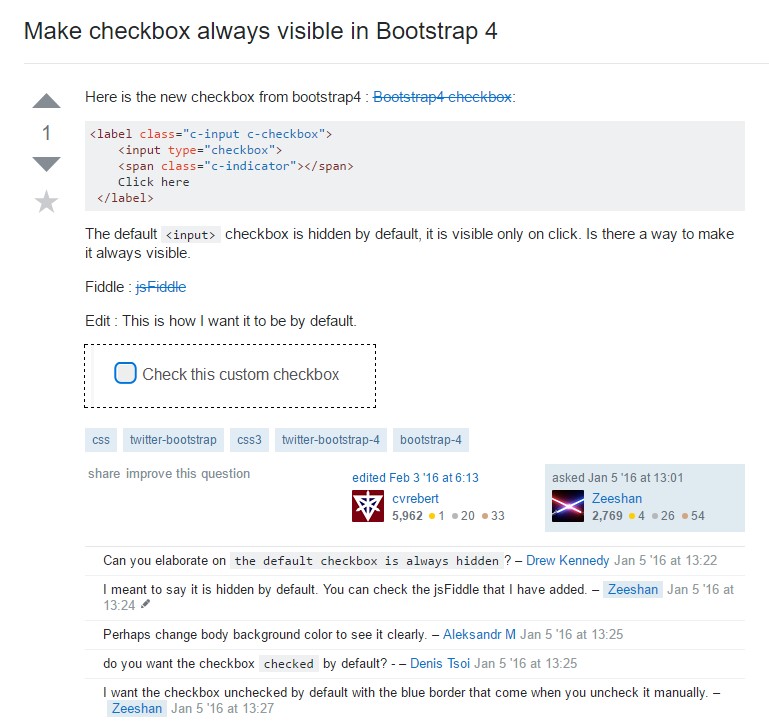
Make checkbox always visible in Bootstrap 4